How KRC Pay works
KRC Pay allows you to initiate a payment using crypto.
The system handles routing and conversion internally.
Payment flow
Four simple steps from creation to confirmation
Payment created
Set amount and purpose. Generate payment link.
You decide what you're paying for and how much.
Crypto payment
Pay with TON or USDT to provided address.
Send crypto from any wallet you prefer.
Routing & swap
System handles conversion and routing automatically.
No manual swapping required — all done in the background.
Confirmation
Receipt generated. Payment status confirmed.
Both parties receive proof and confirmation.
Automatic conversion. Users never manually swap assets.
Recipient choice. No forced crypto acceptance.
What Pay is / is not
Clear boundaries for trust and compliance
Pay IS
Payment initiation layer
Creates and tracks payment requests
Routing system
Handles conversion infrastructure
Confirmation provider
Issues receipts and proof
Pay IS NOT
A wallet
Does not store or custody funds
A bank
Does not provide banking services
A cash-out service
Does not directly send fiat
A user exchange
Users don't trade or swap
This clarity serves as a legal and trust shield — defining exactly what KRC Pay does and doesn't do.
Step-by-Step Guide
Learn how to send and receive payments with KRC Pay
Create a Payment
Set up your payment request in seconds
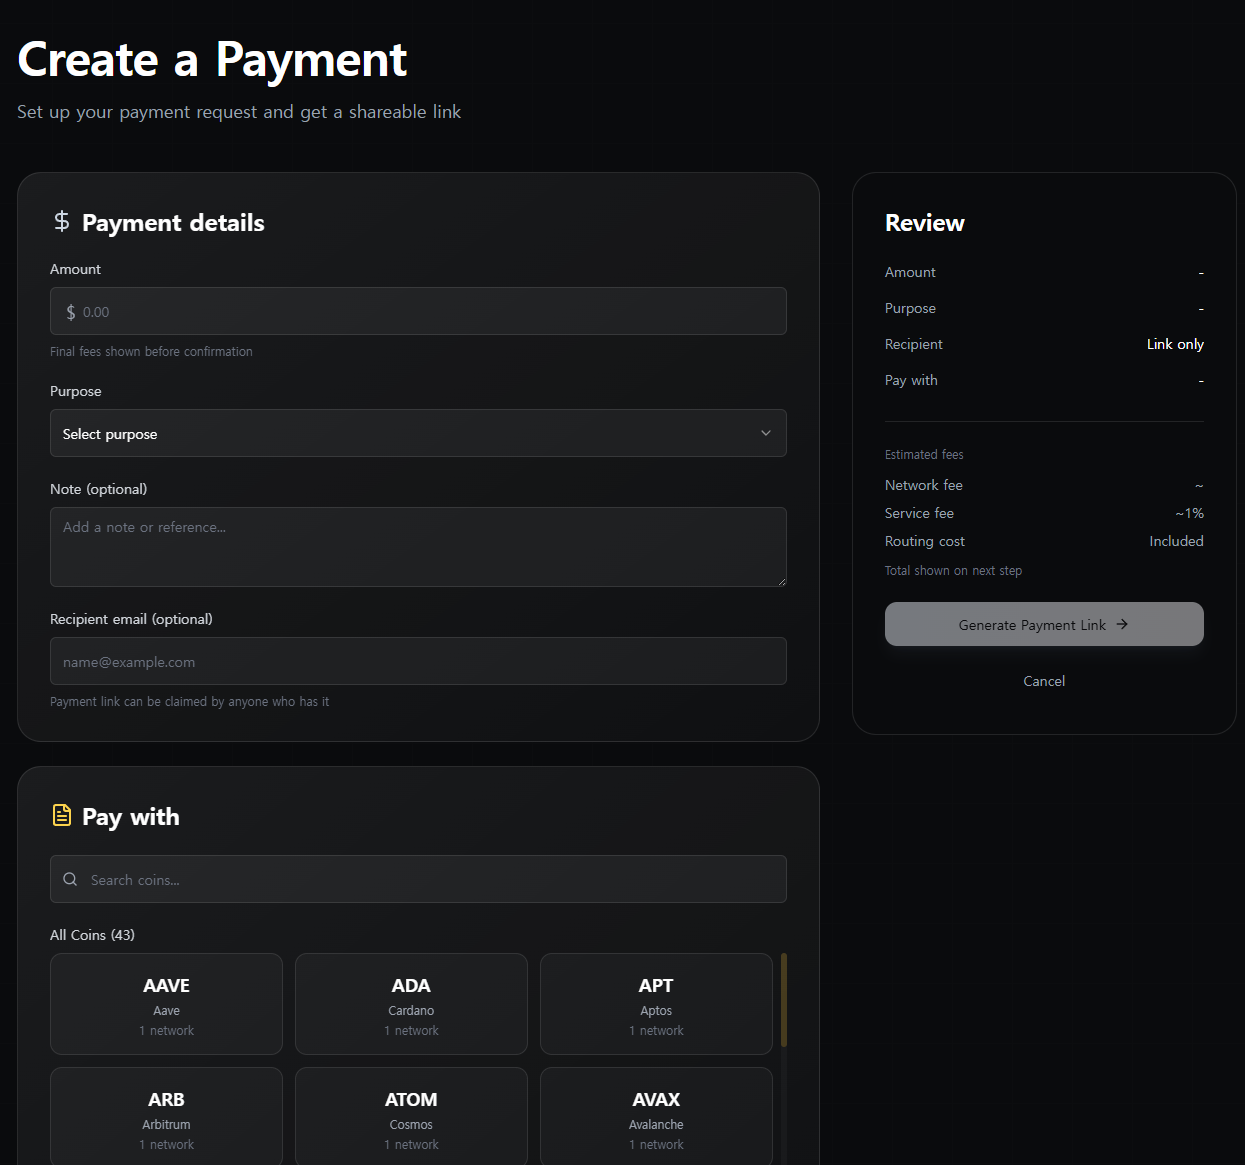
Enter Details
Enter amount, purpose, and recipient email (optional for direct delivery)
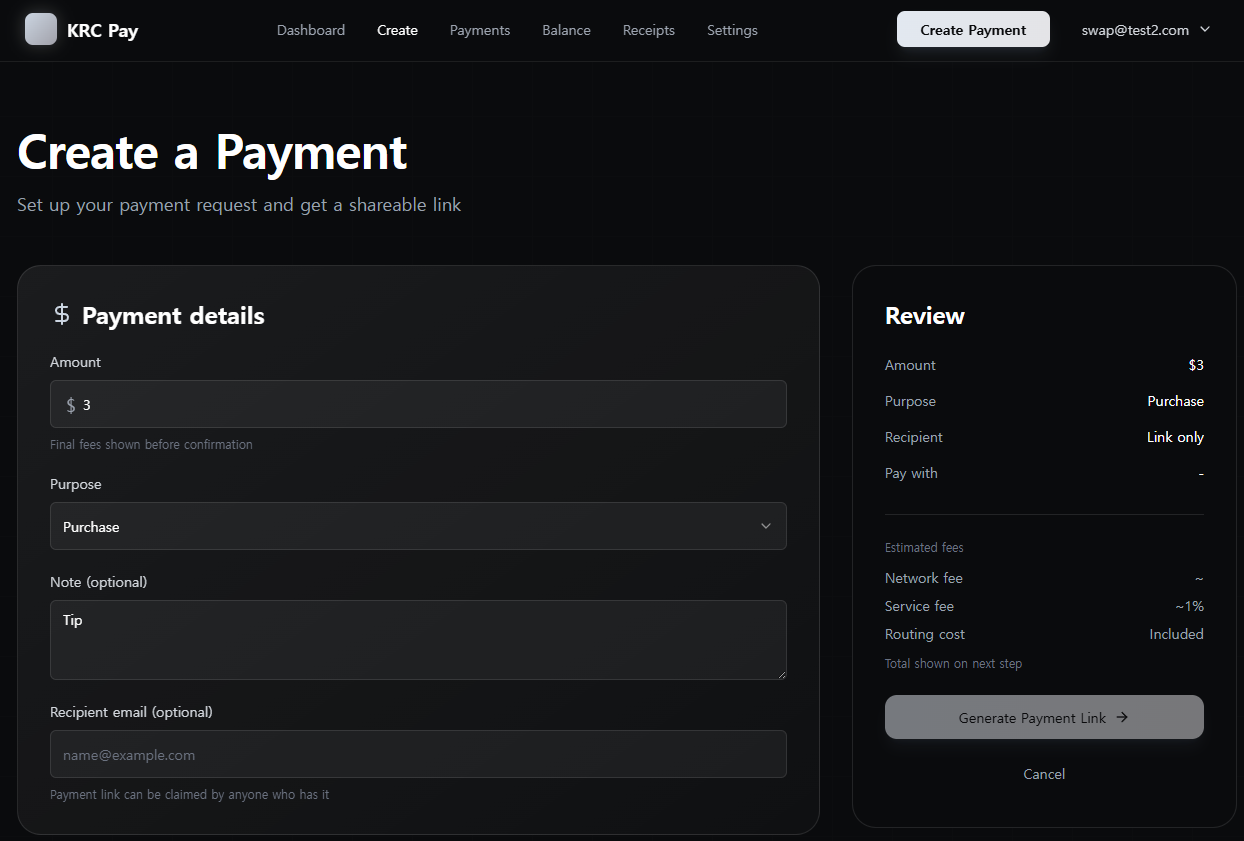
Select Coin
Choose which crypto to pay with from 43+ supported coins
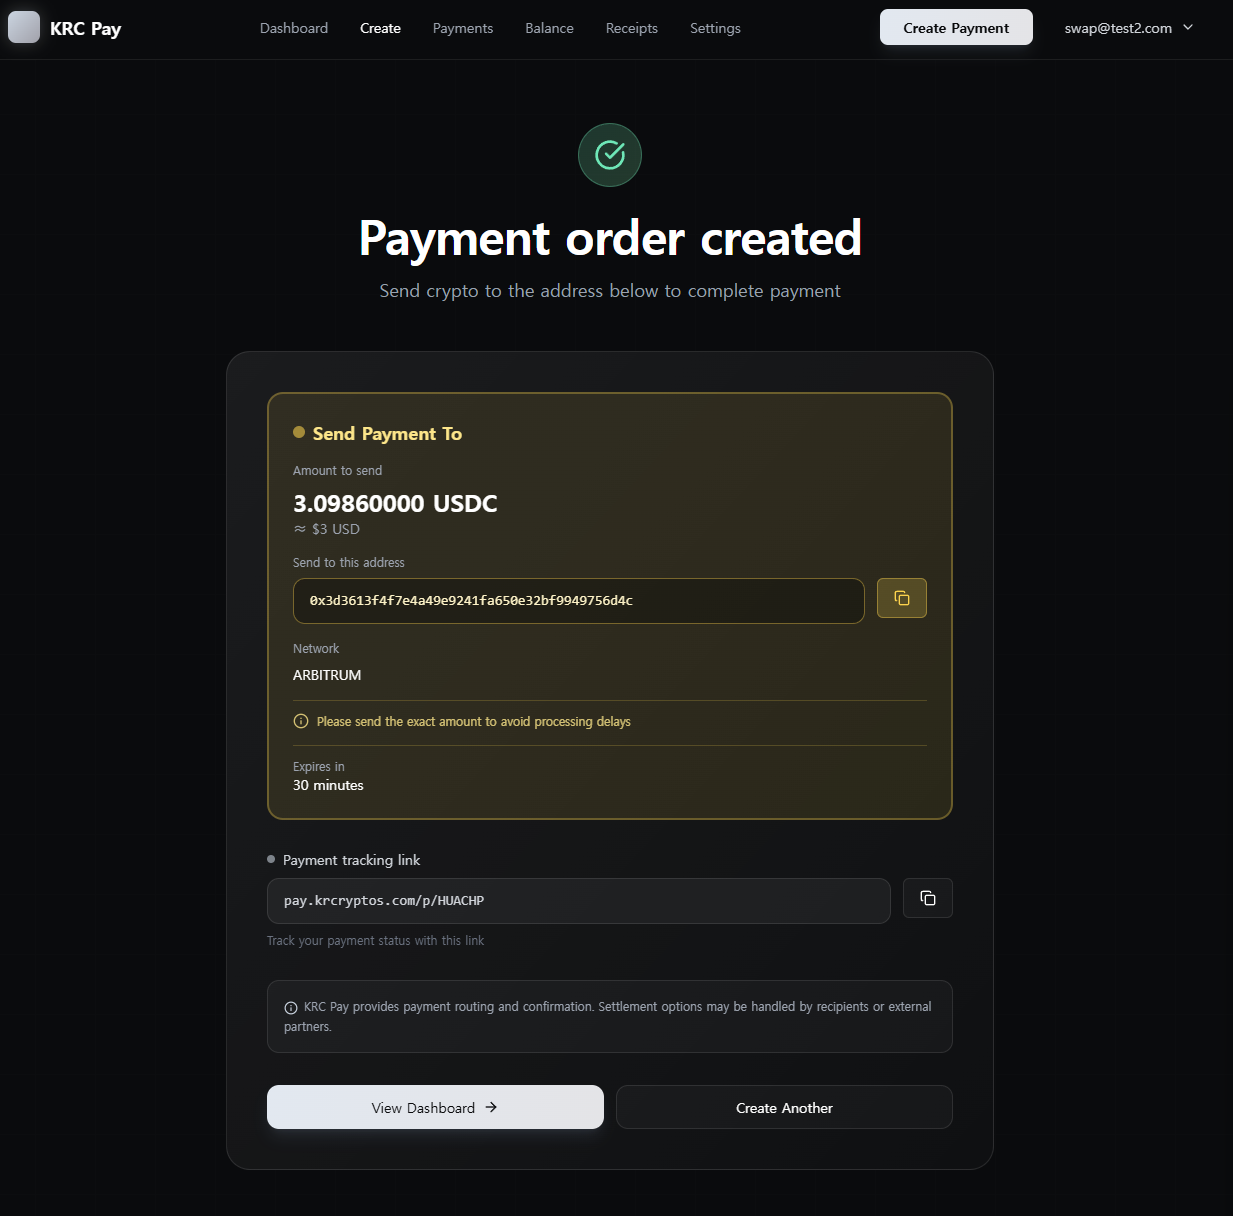
Payment Created
Get payment link and tracking page for monitoring
Pay with Crypto
Send crypto from any wallet you prefer

View Payment
Check payment details and exact amount to send

Send Crypto
Copy address or scan QR code to send payment from your wallet
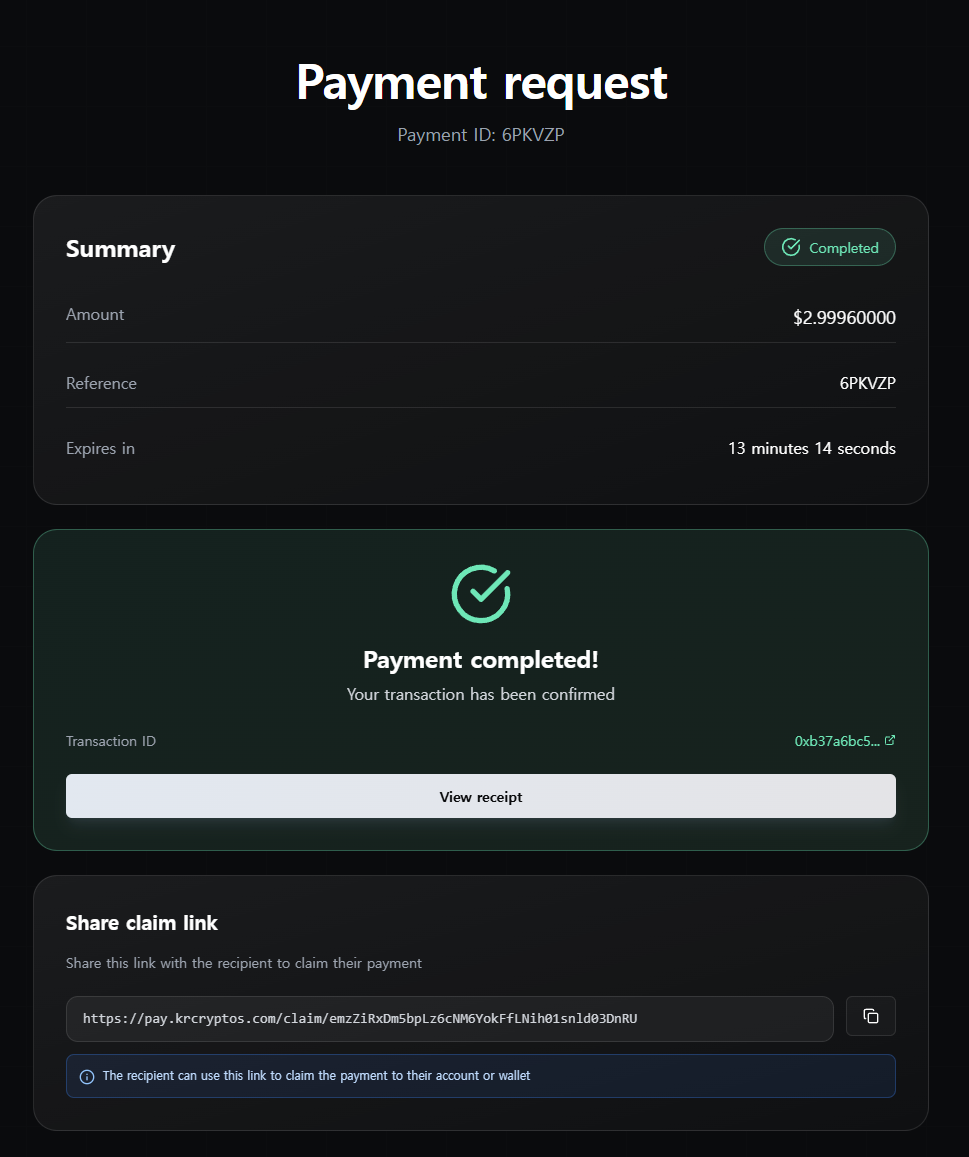
Confirm Payment
System automatically detects and confirms your transaction
Share Claim Link
Send payment link to recipient
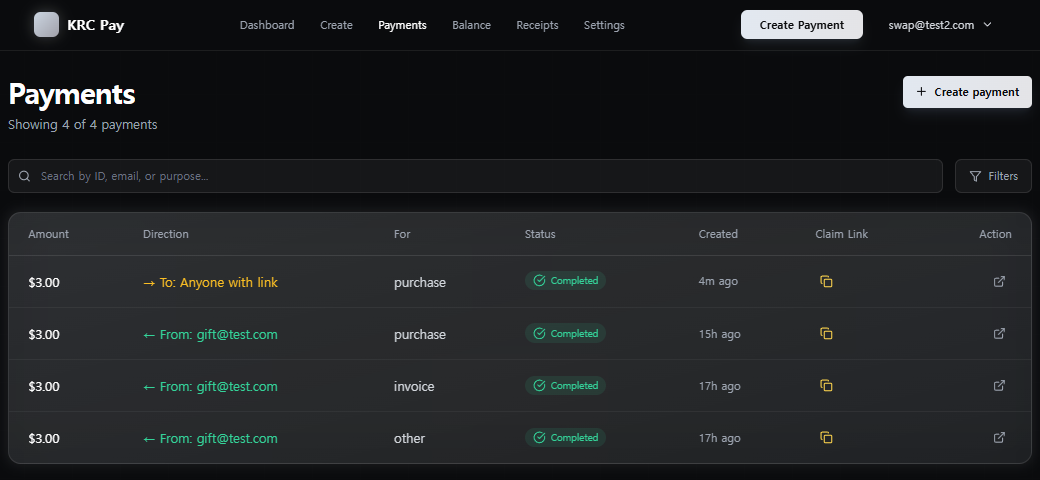
Copy from Payments
Copy claim link from Payments page and share with recipient
Email Recipients
If you entered recipient's email during payment creation, they'll receive the payment directly to their balance
Pro Tip: Registered email recipients get instant balance updates without needing to click any link!
Receive Payment
Claim payment to your account
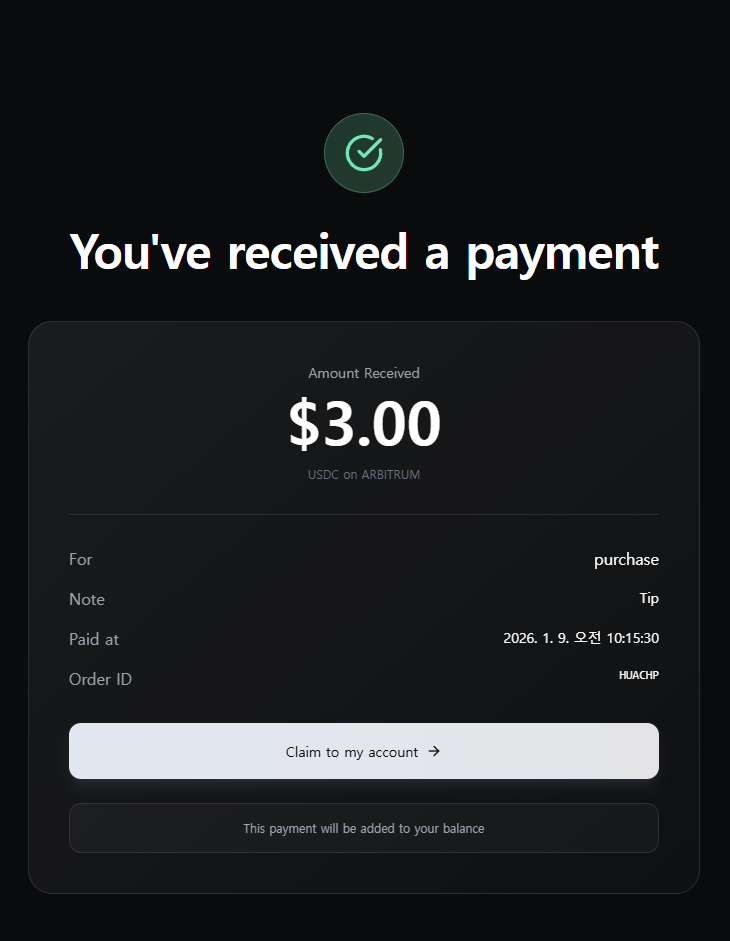
View Payment
Open claim link to see payment details and amount
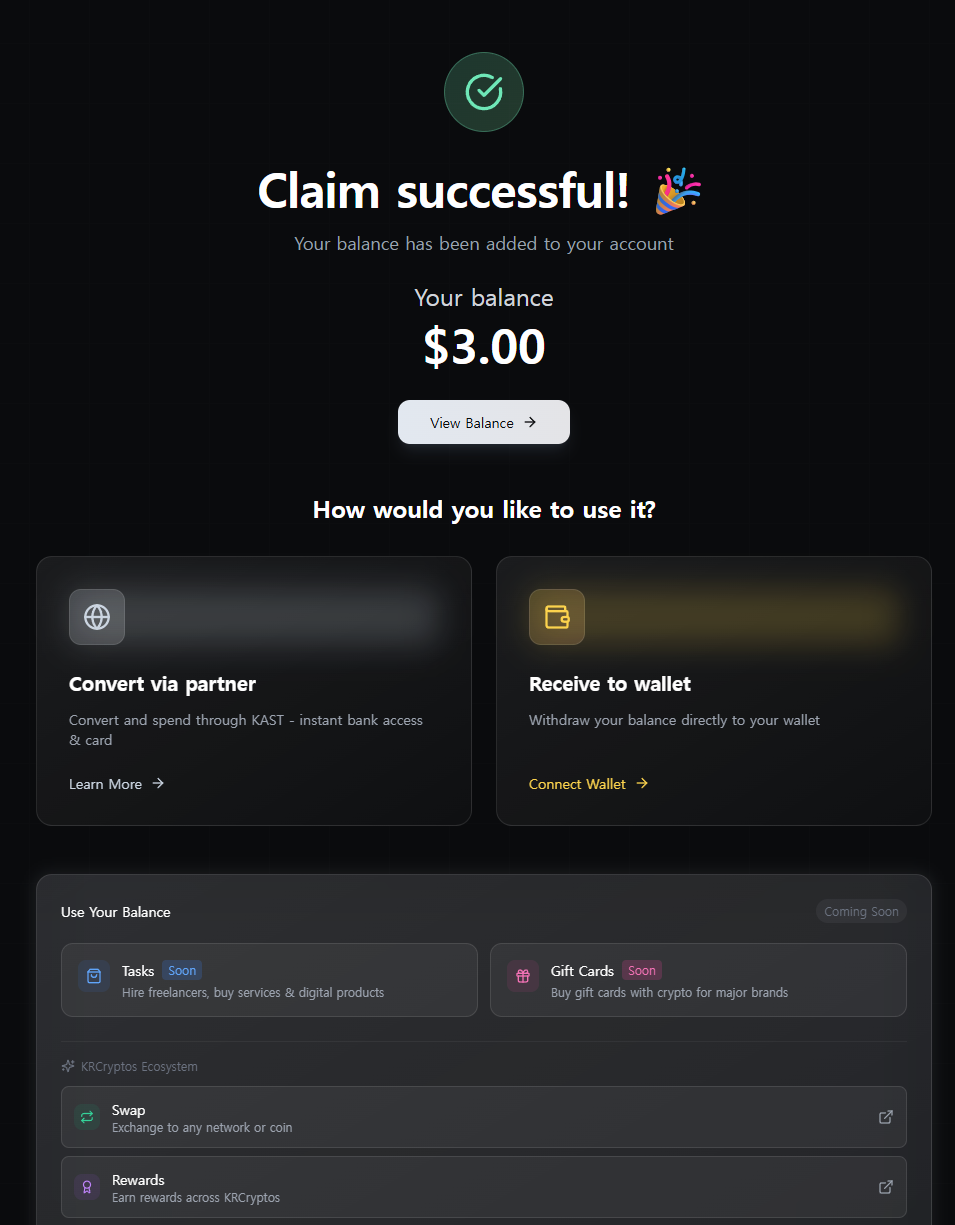
Claim Success
Payment instantly added to your balance
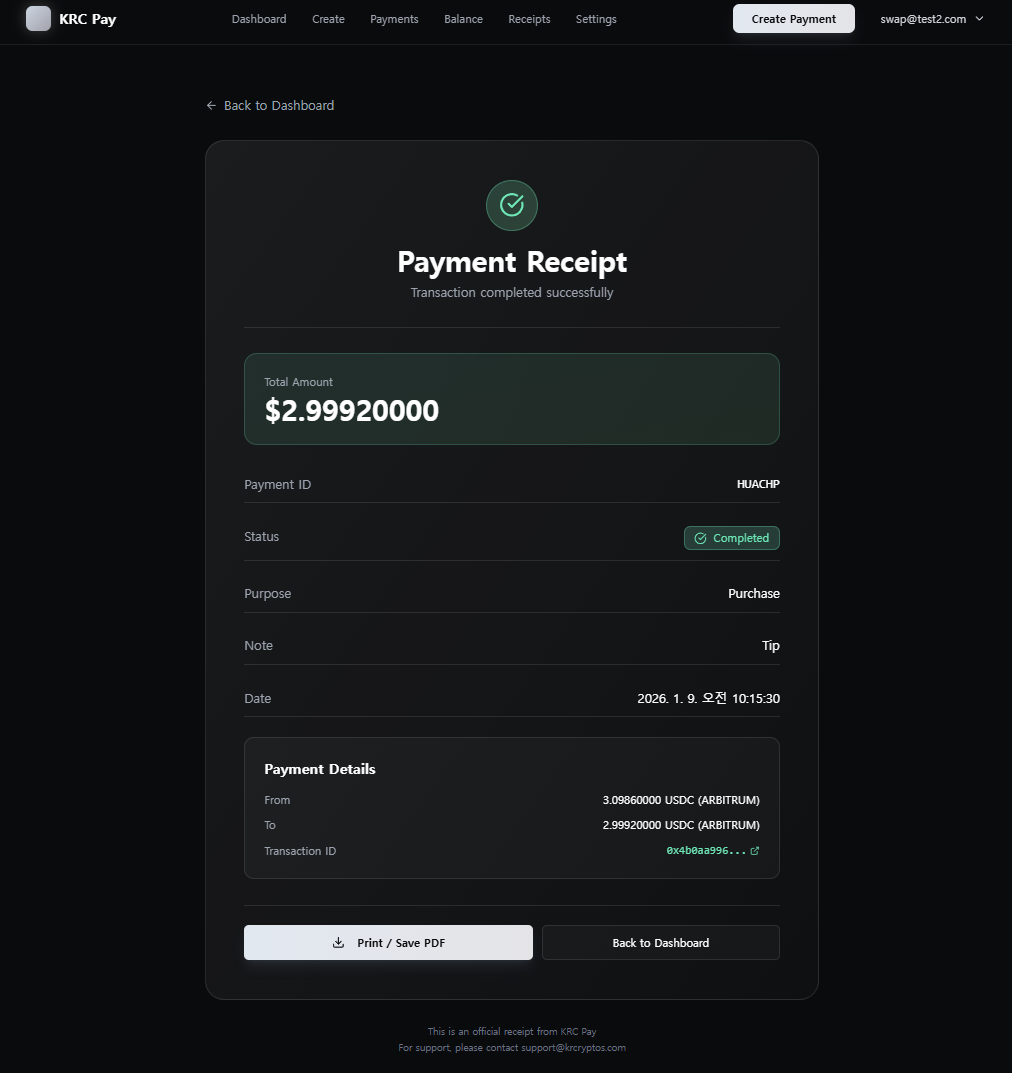
View Receipt
Get proof of payment with full transaction details
Use Your Balance
Withdraw or spend your balance
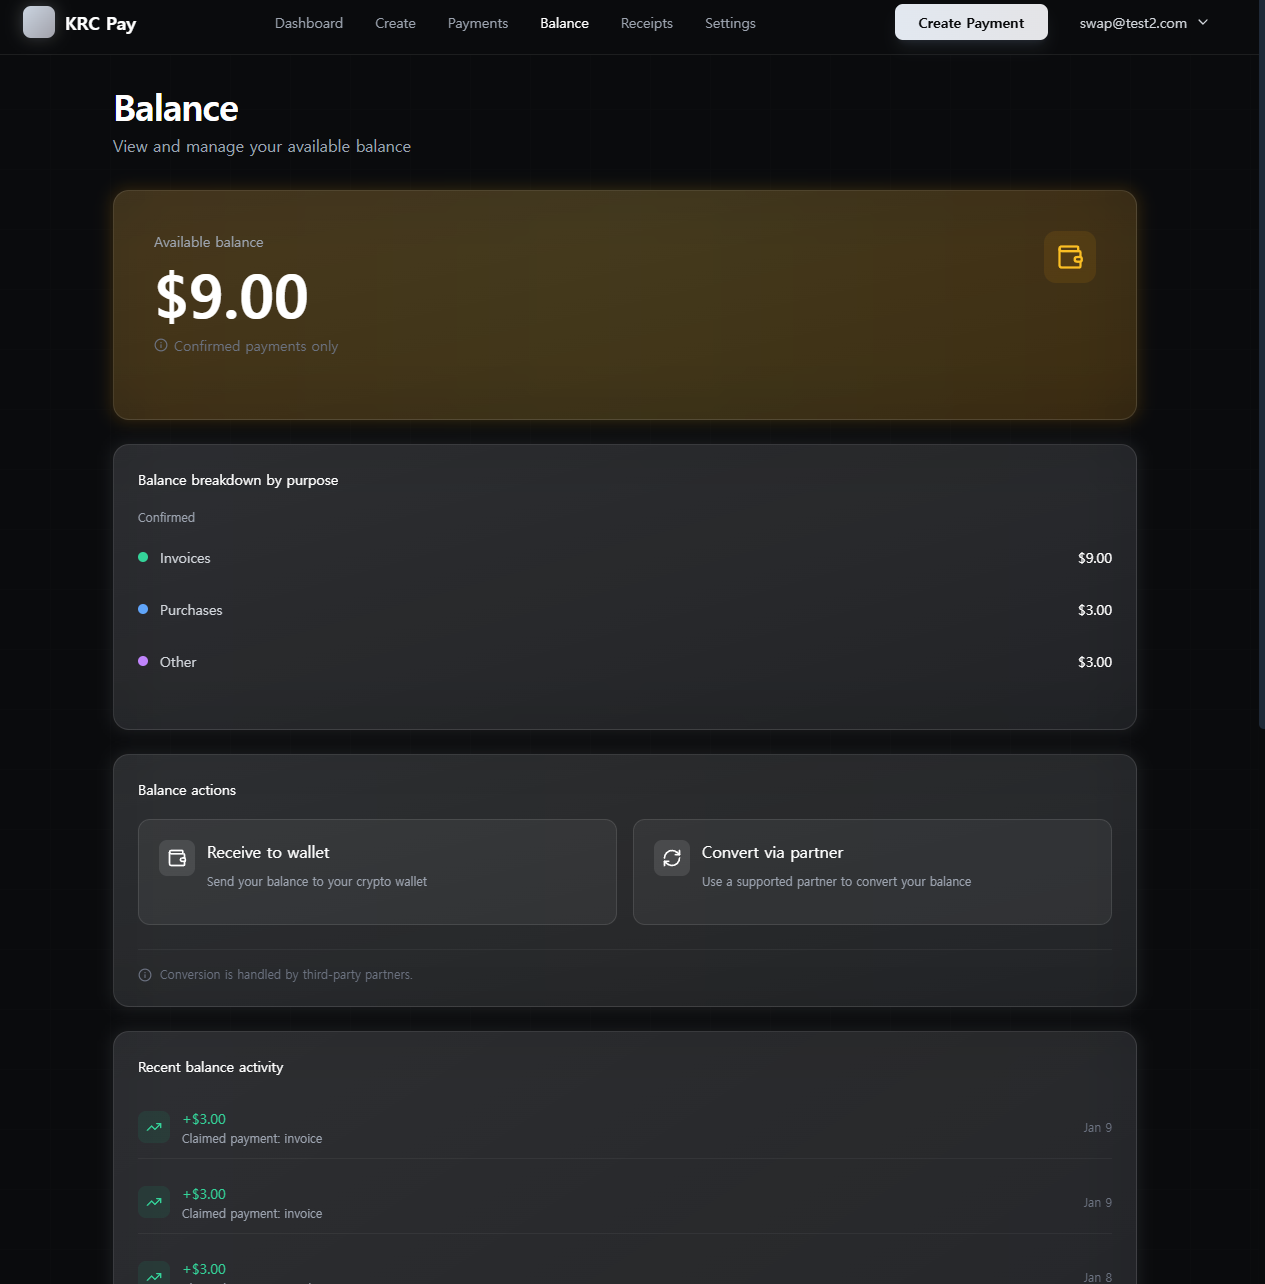
View Balance
Check your available balance and recent activity
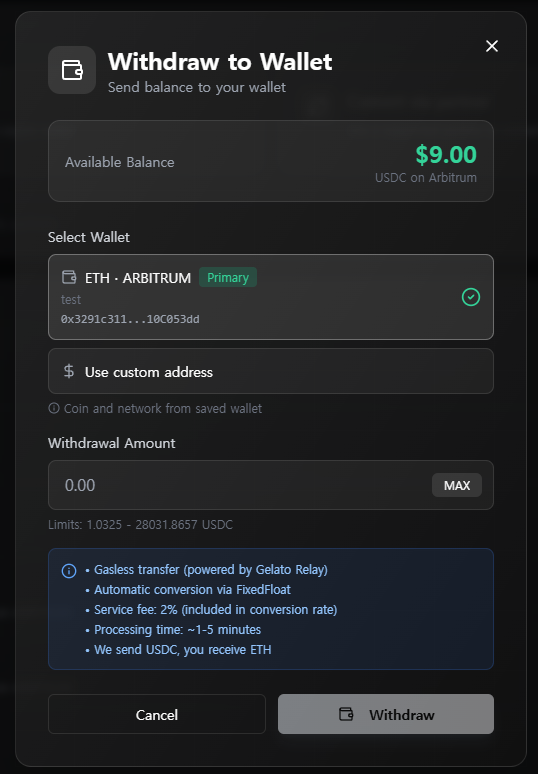
Withdraw
Send balance to your wallet (any coin/network supported)
KAST Partner
Convert and spend through KAST - instant bank access & card
Spend Crypto Anywhere: Use KAST Card for purchases or transfer to your bank account in local currency
Manage Wallets
Save your wallet addresses for quick withdrawals
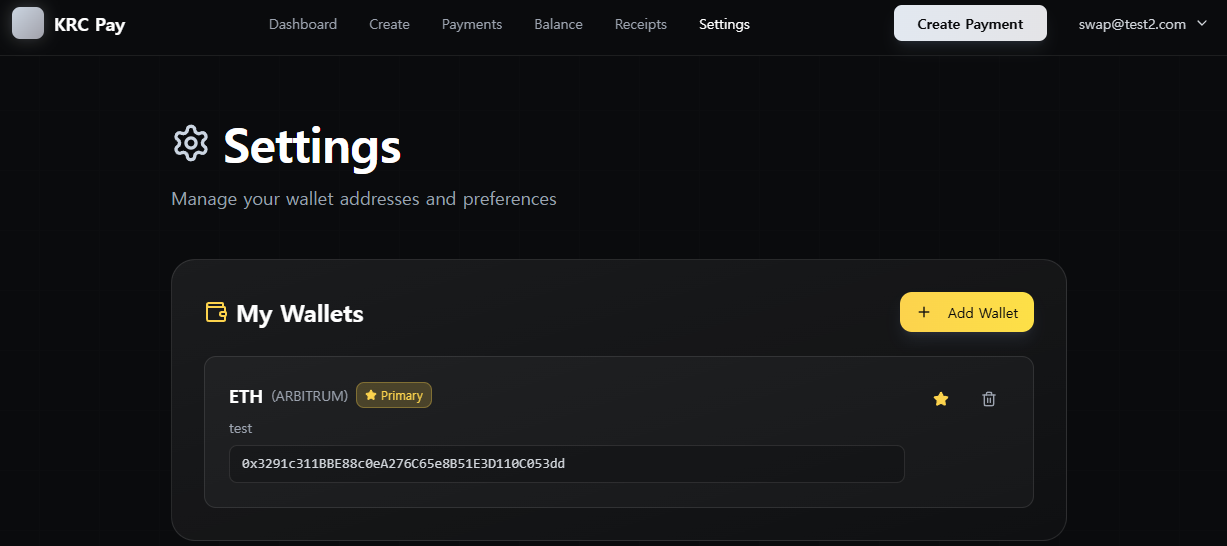
Wallet Settings
Add and manage your crypto wallet addresses. Set primary wallets for faster withdrawals to your favorite addresses.